sexta-feira, dezembro 04, 2009

Defcon para leigos


Ok, você já sabe o que é a Defcon, cansou de ler mensagens em listas e ouvir relatos de brasileiros que já foram para lá e voltaram falando que é uma experiência bacana. Chegou a sua vez. Este artigo irá ajudá-lo com dicas da conferência e da cidade que a hospeda, Las Vegas.

Planejando sua viagem.


A Defcon ocorre todos os anos em um fim de semana próximo ao final de julho e início de agosto. Desde 2009, ela se inicia na quinta (anteriormente era na sexta) e termina no domingo. Procure chegar no dia anterior, para ter algum tempo para descansar da viagem e se aclimatar com a agradável temperatura de Las Vegas no verão. Algo entre 27 graus (de madrugada) a 45 graus (na maior parte do dia). Sim, é quente pacas. E seco. Traga seu rinossoro.

Existem várias opções de vôos do Brasil para Las Vegas. Partindo de São Paulo, há opções da American Airlines, United, Continental, Delta e outras. Os vôos sempre têm uma conexão, que é onde efetivamente você entra nos Estados Unidos, faz a imigração, pega suas bagagens que eventualmente são vistoriadas para em seguida despachá-las novamente ao destino (Vegas). Somente na entrada isso é necessário. Na volta as malas vão direto de Las Vegas ao seu destino final. Falando em malas, quando você compra um vôo internacional, tem direito a despachar duas malas com até 32 kg cada. Se passar disso, paga uma taxa adicional, por volta de US$ 100,00.

Há conexões em Miami, Chicago, Dallas, Nova York e outras. Em média, um vôo São Paulo – Miami dura cerca de 8 horas, e o vôo Miami-Las Vegas, cerca de 4 horas e meia. Compre um vôo em que você tenha um intervalo razoável entre chegar no seu ponto de entrada (nesse caso, Miami) e sair para o destino final. Como eu citei no parágrafo anterior, você terá que fazer a imigração, pegar sua mala, despachá-la. Há também o risco do vôo atrasar. Vale a pena ter um intervalo maior e passear um pouco em Miami (se não quiser ficar esperando no aeroporto) do que perder o voo de conexão.

Comprando suas passagens com antecedência, é possível encontrar valores próximos a US$ 650,00, ida e volta São Paulo – Las Vegas. Consulte seu agente de viagens, ou sites como www.decolar.com.br para encontrar as melhores tarifas. Lembre-se: quanto antes comprar, mais barato fica e mais opções de escolha.

A mesma regra vale para a reserva de hoteis. Consulte os sites www.hotels.com e www.vegas.com para encontrar as melhores tarifas para hoteis em Las Vegas.


Ok, mas Las Vegas tem centenas de hoteis. Onde eu devo ficar ?

Antes de responder, vamos conhecer brevemente Las Vegas em alguns parágrafos. Eu já disse que lá é quente ? Não se esqueça disso. É quente mesmo. E seco.

Há uma rua lá chamada “Las Vegas Boulevard”, conhecida também como “The Strip”. É isso que você vê na maioria dos filmes que se passam em Las Vegas. Tem aquele monte de Cassinos gigantes, luzes e mais luzes. De fato, é a principal avenida de Las Vegas e você pode passar vários dias nela, assitindo shows, indo a parques de diversões dentro dos hoteis (todos os cassinos lá são hoteis) , vendo atrações, fazendo compras e é claro, jogando. Basta você ter muito dinheiro. Caso você seja pobre como eu, tem bastante coisa grátis, como as fontes do Bellagio, o vulcão do Treasure Island, os tigres brancos do Mirage, Leões do MGM, etc. Prepare sua máquina fotográfica, tem muita coisa legal para registrar.

Saindo da Strip, há a região central, chamada Freemont, onde há cassinos mais antigos e um gigantesco painel luminoso que cobre a rua. Vale a visita.

Nas ruas paralelas ou transversais a Strip também há bastante comércio, cassinos e opções de hotéis. Use o Google Earth ou maps para uma vista geral de Las Vegas.
Mas voltando aos hoteis, sua decisão de onde ficar depende de sua decisão relacionada a locomoção.

Pessoalmente, recomendaria que você alugasse um carro. As tarifas de Las Vegas são em geral menores que outros lugares, como Miami, por exemplo. Um carro medio (que nos Estados Unidos equivale a algo grande por aqui) custa cerca de US$ 110,00 por dia, incluindo todos os seguros e GPS. Sim, faça o seguro total. Não é uma boa ideia não ter seguro se alguma coisa acontecer nos EUA. Ah, tem estacionamento em todos os lugares, sem custos. Lembre-se que voe pode estacionar e levar a chave ou deixar em um serviço de vallet. Basta dar um Tip ao manobrista depois. Consulte www.carrentals.com para descobrir qual locadora de veículos tem o melhor preço. Faça sua reserva com antecedência. Dica: A reserva não inclui os custos do seguro e outros opcionais como GPS. Considere uns US$ 60 a mais na sua diária para estes extras. Após reservar, verifique periodicamente se não há taxas melhores ou promoções para upgrade do veículo. Os preços variam diariamente.

Optando por ter um carro, suas opções de hotel não se limitam a proximidade do Riviera, onde a Defcon ocorre. E mesmo que você escolha um hotel próximo, como o Circus Circus, que fica em frente ao Riviera, não significa que você não terá que andar. Na prática, se você ficar no Circus Circus, que é o hotel mais próximo, terá que andar, do seu quarto até o Riviera, uns 300 a 500 metros. Lembra que é quente, né ? O Circus Circus custa cerca de US$ 40,00 por dia.

Já com o carro, é possível escolher hotéis um pouco mais afastados, com preços que variam de US$ 15,00 a US$ 40,00 por dia. Este é o preço do quarto, para até duas pessoas.

Com um pouco mais de dinheiro (e o carro), opções como o Stratosphere (US$ 45,00), Luxor (US$ 75,00), Hilton (US$ 82,00), são interessantes. Estes preços são aproximados, lembre-se de reservar com alguma antecedência para melhores taxas. E é claro, você pode ficar no próprio Riviera, porém, lembre-se que ele lota rápido.

Vegas e proximidades

Ok, você já tem sua passagem, seu carro e seu hotel. O que mais falta ? Bem, além da Defcon, há algumas coisas interessantes para se fazer em Vegas e pode ser uma boa ideia, se seu tempo e orçamento permitir, chegar alguns dias antes ou ir embora alguns dias depois. Como eu já citei, se é sua primeira vez, andar (a pé e a noite) pela Strip e visitar os cassinos é sempre interessante. Uma ou duas noites é suficiente para uma exploração do local. Uma noite na Freemont também é uma boa ideia.

Há diversos shows, como Cirque du Soleil, Blue Man Group, Mágicos, Comediantes, etc. Mais uma vez, procure adquirir seus ingressos com antecendencia. O site www.vegas.com pode lhe ajudar.

Nas proximidades de Vegas, a cerca de 30 milhas está o Hoover Dan, que é aquela represa e usina hidra-elétrica no rio Colorado. Dá para pagar por uma visita que inclui as instalações ou só passar por cima e tirar fotos de concreto e um lago. Sim, é legal, mas só um pouco. Seguindo por essa mesma estrada (93/95), mais umas 50 milhas e você chega em Kingman, de onde pode pegar a Route 66. Este é um passeio muito interessante, histórico e cheio de referências nostálgicas, como motéis, lojas e lanchonetes que parecem ter parado no tempo. A estrada é boa e feita para andar devagar (55 milhas por hora), curtindo a viagem. De Kingman, siga para Hackberry e pare em um antigo posto de gasolina, do lado esquerdo. Paraiso para fotografos. Continue em frente até Peach Springs e depois Seligman onde você pode comer um hambuger na simpática lanchonete chamada “Cheeseburger with cheese”. Aproveite para visitar as lojinhas de souvenirs e tirar fotos dos carros e construções por lá. Converse com os locais, eles adoram os poucos turistas que ainda passam por lá.

Em Seligman você pode continuar na 66, continuar mais 100 milhas até o Grand Canyon, ou voltar, pela própria 66 ou pela I-40, até Kingman e de lá pela 95 até Las Vegas. A paisagem de deserto desse trecho da 66 é difícil de descrever. Muito bonita e hipnotizante. Inicio da manhã e fim de tarde fazem contrastes mais acentuados com as montanhas ao fundo.

Tenha o cuidado de ver antes no Google Maps ou semelhante onde estão os postos de gasolina que ainda funcionam. Lembre-se, é deserto e passa pouca gente por ai. Celular não pega longe das cidades. Leve água e respeite o limite de velocidade se não quiser ser perseguido pela polícia local.

De volta a Las Vegas, é hora daquela cervejinha. Custa por volta de US$ 5,00, em média. Tem dois bares que recomendo: O bar central do cassino Hard Rock, sempre cheio de gente jovem e bonita e um local chamado Carnival, que fica ao lado do Cassino Imperial, na Strip (quase em frente ao Caesar Palace). Se você for à próxima Defcon e estas dicas lhe foram úteis, aproveite para pagar uma cerveja pra mim em um desses locais.

Agora, se você quer economizar e dar uma calibrada antes de sair, passe em um Wal-Mart e compre um pack, já gelado de 30 Buds por cerca de US$ 15,00. Não beba dentro do carro, mesmo se voce for passageiro. A polícia de lá para e prende todo mundo. Alguns hoteis possuem frigobar.

Falando em Wal-Mart, como um velho amigo meu diz, é o local ideal para você comprar aquele pack de 2000 cotonetes que está em oferta. Normalmente você entra para comprar algo que precisa (a cerveja, por exemplo) e acaba saindo de lá com um monte de coisa legal que aqui no Brasil custa caro. Coisas do American Way of life. Batatas Pringles (US$ 1,50), catchup Heinz (US$ 2,00) e outros cacarecos. Só não é mais divertido do que ir à Frys Electronics, o paraíso dos nerds, e na Best Buy.

Perto da Frys (que é perto do Aeroporto) tem também o Las Vegas Outlet, onde você encontra marcas famosas com preços de fato baratos. Tênis, roupas, relógios, perfumes e souvenirs a preços excelentes. Mais uma razão para alugar aquele carro...

E a Defcon ?

Bom, depois de todo esse turismo e compras, vamos ao que te trouxe a Las Vegas.

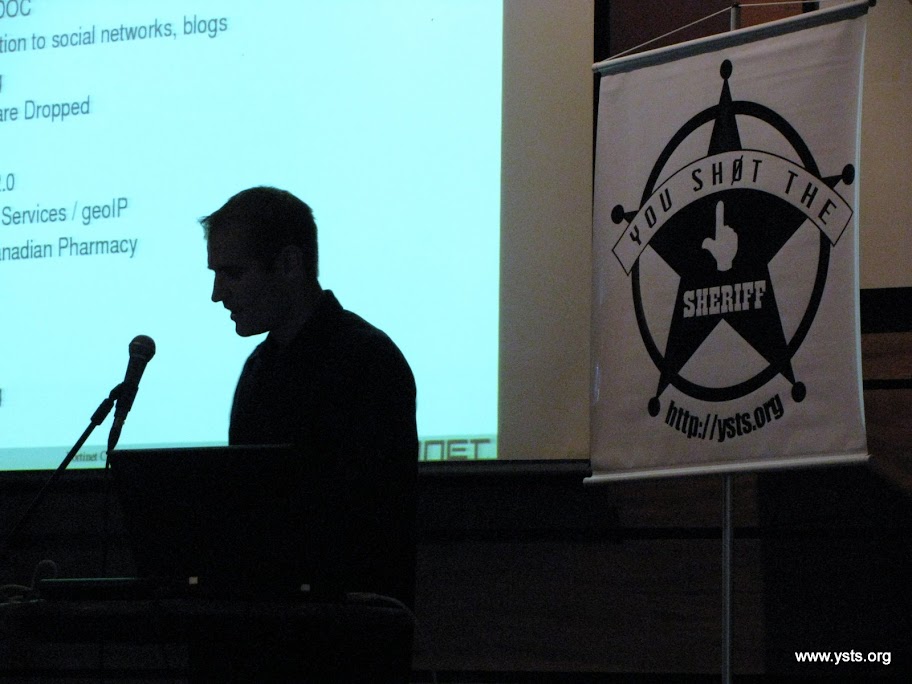
A primeira coisa é ir buscar seu crachá. O Crachá da Defcon sempre é bacana e faz alguma coisa especial (o desse ano, por exemplo, tinha um led que reagia a sons). Já é tradicional nos ultimos anos que os crachás cheguem e se esgotem rapidamente. Se isso ocorrer, você fica com um provisório e depois troca pelo definitivo, mas isso significa que você terá que enfrentar duas filas. Procure pegar o seu crachá na quinta o quanto antes. Além do crachá você ganha uns adesivos, um CD com os materiais e a programação do evento.

Aproveite e pegue outra fila para comprar seus souvenirs da Defcon, como a camiseta oficial, canecas, copinhos, etc. As coisas legais acabam cedo também.

De uma lida na programação para saber dos diversos eventos que ocorrem na Defcon. As palestras são apenas uma parte do que rola lá. Por exemplo, há um concurso para ver quem gela a cerveja no menor tempo. Nitrogenio líquido e outras geringonças participam. Coffe Wars é um concurso para eleger o melhor café. Mistery Chalenge, como o nome diz, é um desafio misterioso. Capture the Flag é um torneio para equipes pré qualificadas, onde os participantes tentam atacar e defender diversos servidores disponibilizados pela organização. Cuidado, não circule perto da area do capture de flag com a câmera fotográfica ligada. Alias, cuidado ao tirar fotos na Defcon, algumas pessoas não gostam de ser fotografadas e um Goon poderá lhe pedir que apague alguma foto.

Goon ? Eles são as pessoas, voluntárias, que organizam as coisas durante o evento. Um misto de segurança com faz tudo. Os Goons têm autoridade na Defcon, siga suas instruções para não ter problemas. Alguns parecem normais e inofensivos, outros se parecem com sargentos do exército. Você irá reconhecê-los, não se preocupe.

Na área do hotel onde ocorre a Defcon há umas escadas que dão acesso aos Skyboxes. Lá você Irá encontrar coisas interessantes como o Hardware Hacking Village, onde pessoas podem aprender e compartilhar técnicas de modificação de hardware. O seu crachá pode ser customizado aqui.

Outra sala nos Skyboxes é o Lockpicking Village, onde há palestras e hands-on sobre abertura de cadeados, fechaduras e tudo o mais que se possa imaginar. Há uma “lojinha” que vende as ferramentas também.

De volta ao piso inferior, não deixe de visitar a Vendor Area, onde se pode adquirir livros, hardware novo ou usado (de placas WI-Fi até como estações Sun ou Silicon Graphics antigas, passando por roteadores, switches, notebooks, tablets, palms Macs antigos e por ai vai). Há também stands da EFF, Hackers for Charities, DJ’s, roupas, acessórios e algumas outras coisas bizarras difíceis de descrever. Leve dinheiro.

Finalmente, não deixe de ver algumas palestras. Há normalmente 4 ou 5 tracks e vale a pena dar uma lida no descritivo de cada palestra antes de escolher aonde vai, pois muitas delas tem títulos não muito óbvios. Veja qual é a sala que sua palestra será e posicione-se na fila do lado de fora, se houver. Caso não haja, você pode entrar no fim da palestra anterior e esperar na sala, mas observe que quando a palestra seguinte é muito Hype, os Goons pedem que todos saiam da sala, priorizando quem está do lado de fora, aguardando na fila. Respeite essa organização, mesmo sendo meio chata. E não seja um espertoman. Nada de furar fila ou tentar entrar por alguma porta alternativa.

Na Defcon não tem horário de almoço, coffe break, etc. Procure uma sala que vende comida. É um serviço oferecido pelo hotel e você poderá apreciar quitutes como finger tips, hamburgers e aquela salada americana. Pegue sua guloseima favorita, pague e encha de molhos. Sim, você sobrevive a alguns dias comendo assim. E é barato, menos de 10 dolares te alimentam. Sobra mais para a cerveja. Aliás, das 5PM a 7PM, a cerveja fica mais barata na Defcon. Aproveite !

Finalmente, há diversas festas que rolam nos dias anteriores, posteriores e durante a Defcon. Algumas são fáceis de ir, como a Freakshow. Outras dependem de você ser convidado, normalmente com antecedência. As festas normalmente são patrocinadas por algum fabricante de produtos de segurança. Ter algum deles em sua rede de relacionamento pode garantir um convite. A vantagem das festas é que aquela cerveja de US$ 5,00 é grátis, além de outras bebidas. Algumas festas ocorrem em casas noturnas bacanas de Las Vegas e também é uma oportunidade para conhecê-las sem custo. Fique atento aos horários, as festas começam e terminam exatamente no horário do convite.
Bem, essas foram as dicas básicas para quem nunca foi a Defcon. A cada ano, novos brasileiros passam a integrar a trupe que vai lá. E voltam no ano seguinte. Deve significar alguma coisa. Nos vemos em Vegas !


(*) Artigo escrito originalmente para a Antebellum


quinta-feira, dezembro 03, 2009

YSTS 4 - CFP

A chamada de artigos para a conferencia yStS (you Sh0t the Sheriff) está aberta!

A quarta edição irá acontecer novamente em São Paulo, Brasil, no dia
17 de Maio de 2010.

INTRODUCAO

O you sh0t the Sheriff é um evento único, dedicado a mostrar os temas
mais interessantes e atuais relacionados à segurança da informação,
trazendo uma combinação de palestras de alta qualidade com
palestrantes renomados de diversas partes do planeta e cobrindo
diversos tópicos sobre o tema.

Nosso objetivo principal é permitir que os participantes tenham uma
visão do estado atual da segurança no mundo, combinando diferentes
segmentos da área.
O evento é basicamente para convidados, assim sendo, submeter uma
apresentação é certamente uma boa maneira de tentar participar,
principalmente se você reside no Brasil

Em função do sucesso das edições passadas, nós mantivemos o evento no
mesmo formato:

- Ambiente descontraído
- O YSTS 4 vai acontecer em um local secreto (anunciado somente aos
participantes algumas semanas antes do dia da conferencia)
- Novamente o este local secreto será em um aprazível bar ou pub
- E sim, teremos (alguma) comida e (bastante) bebida

TÓPICOS

O foco do YSTS 4 são assuntos relacionados com segurança da
informação, incluindo (mas não limitado a):

* Sistemas operacionais
* Tópicos sobre Gestão e Carreira
* Dispositivos móveis/sistemas embarcados
* Auditoria e controle
* Redes sociais
* Políticas de segurança
* Problemas com protocolos
* Redes/Telecomunicações
* Redes sem fio e Radiofreqüência em geral
* Resposta a incidentes
* Information Warfare
* Guerra de informação
* Código malicioso / BotNets
* Falhas dirigidas a usuários
* Programação segura
* Hacker Spaces / Comunidades hacker
* Fuzzing
* Segurança física
* Virtualização
* Segurança em aplicações WEB
* Computação nas nuvens
* Criptografia / Ofuscação
* Infra-estrutura e sistemas críticos
* Bafômetro hacks
* E qualquer outra coisa relacionada com segurança que você imagine
que seja interessante ser apresentada na conferência

Nós gostamos de palestras curtas, então, por favor, lembre-se que sua
palestra deve caber em no máximo 30 minutos.

Como novidade, este ano nós também aceitaremos palestras de 15 minutos.

Algumas pessoas não precisam de 30 minutos para passa sua mensagem ou
gostariam de falar sobre um projeto recém iniciado. Para estes casos
15 minutos será suficiente.

You sh0t the Sheriff é certamente a conferencia perfeita para lançar
seus projetos novos, confie em nós 
E sim, nós preferimos coisas novas e novos palestrantes são mais que
bem-vindos. Se você tem uma algo bacana para falar, isso é o que
importa.

PRIVILÉGIOS PARA OS PALESTRANTES
(Somente para palestras de 30 minutos)

* R$ 700 para auxilio nas despesas de deslocamento para palestrastes
que residam fora da cidade de São Paulo;
* Café da manha, almoço e jantar durante a conferencia;
* Festa oficial pós-conferencia (e não oficiais também);
* Auditoria de produtos em churrascarias tradicionais;
* Entrada vitalícia para todas as futuras edições da conferencia (Sim,
se você já falou em alguma edição passada do yStS você tem entrada
grátis garantida, pode nos pagar uma cerveja por isso... hmm esqueça,
as bebidas no evento são grátis).

SUBMISSÃO

Cada submissão de palestra deve incluir as seguintes informações:
* Nome, titulo, endereço, email e telefone para contato
* Biografia resumida e qualificações
* Experiência em apresentações
* Sumario ou abstrato da apresentação
* Esta e uma palestra de 15 ou 30 minutos?
* Recursos necessários (Alem do projetor)
* Outras publicações ou conferencias onde este material foi ou será
publicado/submetido

Nos aceitamos submissões em Ingles, Português ou Espanhol

DATAS IMPORTANTES

Data Final para submissão - 28 de Fevereiro 2010 (23:59 - Horário de Brasília)
Notificação das palestras aceitas - 20 de Março 2010
Data Final para envio do material aceito: 5 de Maio 2010

Por favor, envie sua submissão para cfp/at/ysts.org

CONTATOS

Submissão de artigos: cfp/at/ysts.org
Perguntas em gerais: b0ard/at/ysts.org
Questões sobre patrocínio: sponsors/at/ysts.org

COISAS RELACIONADAS

Arquivos de palestras anteriores, incluindo os vídeos

Esperamos vê-lo(a) lá!

OBS: Para quem não conhece, veja como foi a edição 3


Luiz Eduardo & Nelson Murilo & Willian Caprino
http://ysts.org

quinta-feira, novembro 19, 2009

Globo News


Em um breve momento de fama, fui entrevistado no programa Espaço Aberto - Ciência e Tecnologia, na Globo News. :)

sexta-feira, outubro 16, 2009

Videos do YSTS 3

Noticia meio velha, mas os videos do YSTS 3 já estão no ar. Abaixo, o clipe geral.

ysts 3.0 from leduardo on Vimeo.

Behold

Behold é um search engine para o Flickr, que permite encontrar imagens boas, com a tag que você indicar, livres para uso.
A novidade é a opçao "that look like a picture of (a)" que aparece após o primeiro search. Segundo o site, esta feature permite que o Behold identifique elementos visuais nas fotos e apresente os resultados baseados nesta escolha. Experimente para entender melhor :)

segunda-feira, outubro 05, 2009

AppSec Brasil 2009

CHAMADA PARA PARTICIPAÇÃO

Conferência Internacional de Segurança de Aplicações, organizada e promovida pela comunidade TI-controle e pelo Centro de Informática da Câmara dos Deputados, em parceria com o OWASP, Capítulo Brasil, e com apoio da Universidade de Brasília (UnB)

O Centro de Informática da Câmara dos Deputados e a Comunidade TI-Controle convidam a todos a participarem da Conferência Internacional de Segurança de Aplicações (AppSec Brasil 2009), que ocorrerá na Câmara dos Deputados (Brasília, DF) de 27 a 30 de outubro de 2009.

Haverão mini-cursos nos dias 27 e 28 de outubro, seguidos de sessões plenárias de trilha única nos dias 29 e 30 de outubro de 2009.


Keynotes

Dr. Gary McGraw, CTO da Cigital
O Modelo de Maturidade Building Security In (BSIMM)

Jason Li, Aspect Security
Ágil e Seguro: É possível fazer os dois?

Dinis Cruz, OWASP Board
Apresentação do Projeto OWASP

Kuai Hinojosa, NY University e OWASP
Implementando Aplicações Web Seguras Usando Recursos do OWASP


Palestras

A Conferência contará com palestras técnicas que tratarão diversos aspectos de Segurança de Aplicações. Os temas incluem:

  • Segurança de aplicações web
  • Otimização de gastos com segurança
  • SQL Ownage
  • ferramentas.


Mini-cursos

A Conferência contará também com 5 mini-cursos:

  • Gestão de Riscos de Segurança Aplicada a Web Services
  • Segurança Web: Técnicas para Programação Segura de Aplicações
  • Segurança Computacional no Desenvolvimento de Web Services
  • Tecnologias de Segurança em Web Services
  • Hands on Web Application Testing using the OWASP Testing Guide.


Local

A Conferência ocorrerá na Câmara dos Deputados, em Brasília. As plenárias serão no auditório Nereu Ramos, no Anexo II e os mini-cursos serão no Centro de Formação, Treinamento e Aperfeiçoamento.


Inscrições

A participação na Conferência será gratuita, mas, devido à limitação de lugares, será necessário inscrever-se previamente.

As inscrições estarão abertas a partir do dia 29/10/2009 na URL: http://www.camara.gov.br/appsecbrasil2009


Informações

Para maiores informações, favor consultar os sites abaixo ou enviar email para appsec.brasil@camara.gov.br

Inscrições e informações sobre a conferência: http://www.camara.gov.br/appsecbrasil2009
Comunidade TI-Controle: http://www.ticontrole.gov.br
Câmara dos Deputados:
http://www.camara.gov.br

domingo, setembro 27, 2009

Free Advanced Hard Drive Cloning Tool from Clonezilla


via MakeUseOf.com by Benjamin on 9/26/09

Imaging hard drives is the process of taking a hard drive and copying it bit by bit to create an exact replica, in a way an "image" just like a photograph of a person is a snapshot of them at any moment in time. The cloning part is the process of taking that "image" of a hard drive and placing copies of it on one or more other hard drives.

In a cloning project I worked on, my favorite freeware product from my googling journeys was Clonezilla. Clonezilla is free! Clonezilla is a good tool for taking a snapshot of a system and reverting back to it later as a backup or to get things the way you once liked them.

When you have a new computer and begin installing software that you enjoy using, that would be a great time to image the hard drive in case something happens later. This can save time instead of having to reinstall your operating system if there is a virus or corruption in data. Creating a copy of a hard drive can also save you from ruining the state of a computer due to tinkering, installing software, etc. If you do PC repair for customers or as a hobbyist, you can also use this software before beginning work on some computers in case you would need a point of reference for any reason. Clonezilla, clones a 40 gigabyte hard drive in about 15 minutes.

Clonezilla has two forms, Clonezilla live and Clonezilla ServerEdition (SE). Clonezilla live is used for cloning single machines while Clonezilla SE is for multiple machine deployments. This article is about Clonezilla live.

When using the Clonezilla live version, I burned it to a CD and then set the computer to boot from that CD. The first screens after Clonezilla begins, let you choose video resolution, language and keyboard layout.

screenresGimp

The following screen is where you will select to "Start_Clonezilla" or "Enter_Shell" which is to enter command line mode, to make things easier on myself I selected "Start_Clonezilla".

start_clonezillaGimp

At the next screen I selected "device-image". The other option is to go direct from partition to partition or disk to disk or any combination in between, in case your choice is to only clone a single partition of a drive to another drive. I wanted to clone the whole enchilada so I selected "device-image".

device-imageGimp

The next screen was selecting where to place the image that was going to be created. Because I was saving the image across our network, I did not choose the more popular option of "local_dev" to save on a local hard drive or USB drive. If using "local_dev" you will just need to ensure the storage device has sufficient space for the image being cloned. The option that worked for me was selecting "samba_server" which is, in this arena, equivalent to a shared folder on a Windows network. You must allow write permissions on the shared folder for the account that is chosen.

samba_serverGimp

After this step in the process, another thing that has to be decided is how to get an IP address, either statically assign one or send out a DHCP broadcast in search of one so the computer can begin talking on the network.

Then the next option is choosing the location where the Clonezilla image is going to be stored. You can either enter an IP address of the computer where the image will be stored or you can enter the Fully Qualified Domain Name of the computer, which might be something like "cloneserver.internaldomainname.com". The next step is to choose which domain that computer resides on. Keeping with the previous example, I would enter "internaldomainname.com".

Then you will be prompted to enter a username that has permissions to that save location. The name of the shared resource must also be provided, Clonezilla by default will elect to use a folder called "/images". You must ensure that your shared resource and the response here match. We were placing our images in a folder named "CLONEZILLA", so we would change "/images" to "/CLONEZILLA". Make sure yours match also; if you get red letters in a message, there was a problem.

Now you will be prompted to hit Enter to put in the password associated with the account you chose. You will see a password prompt but when you type, no asterisk marks "***" will appear. Hit Enter after typing your password correctly. You must also select beginner or expert mode, since I had never used it before and I like doing things the easy way, I selected beginner mode.

In our project, when I wanted to copy a hard drive and save it as an image for use on other computers, I selected the "savedisk" option. When you want to restore an image to a hard drive, the process is very similar except at the option page where you originally selected "savedisk" you would select "restoredisk" instead. Some of the options after choosing to restore are not there; like you won't be prompted to name the image but rather select it from a list of image files that are detected on the shared resource.

restorediskGimp

Then you must give the image a name. Which hard drive you are making a replica of, or pulling an image to, must also be selected, if there is only one hard drive to clone or overwrite then it will already be selected for you.

imagenameGimp

Then you can begin the restoring process, by hitting Enter a couple of times, and confirming the actions. For other freeware cloning alternatives you could try nLite, PC Inspector Clonemax,Marcium Reflect Free Edition, or Odin and let us know what you think.

Check out the software and documentation from the Clonezilla website.

quinta-feira, setembro 10, 2009

Unlikely (We Hope!) Video Game Peripherals


via Neatorama by John Farrier on 9/10/09


Image:Kent Smith, Gizmodo

Gizmodo held a photoshop contest for video game peripherals that will probably never be developed. Above is the…uh, animal husbandry Nintendo Wii controller by Kent Smith, which took 3rd place. There are 42 reader-submitted images at the link.

Link via GearFuse

quinta-feira, setembro 03, 2009

How To Find Unknown Device Drivers By Their Vendor & Device ID


via MakeUseOf.com by Saikat Basu on 9/2/09

ThumbnailRule No.1: Never lose your device driver CDs.

Rule No.2: Be prudent and keep a backup copy close by.

Rule No. 3: If you lose your driver files, know where to download it from again.

Congratulations! If you have flouted at least two of the above rules, then this post might serve as deliverance from the three cardinal sins. I am a fellow sinner. But, the third rule has often bailed me out and it's thanks to a little postscript to the third rule that has washed away my need for penance.

Device Manager is the place where all drivers are displayed. An unknown device gets a yellow question mark against it in Device Manager. The causes could be one or a few – You could have installed the wrong device driver which the OS does not recognize. Or the hardware itself could be faulty. All such cases lead a device driver to be classified as an unknown device.

The easiest way to resolve an unknown status is to find and download device drivers from the manufacturer's website. The respective websites usually have drill down menus to take you to the right driver for your OS. But what if you can't recollect the make or brand of the device? To err is human; to fix it is divine duty. Thankfully, ways exist that makes correcting unknown device status as easy as a prayer.

The Manual Way from the Device Manager

Every device driver comes with two identity numbers – the Vendor ID and the Device ID. These two numbers can be used to track down the manufacturer and the specific device driver. The Device ID is the most unique identifier for a device. Hardware ID's can be less specific. Device ID is what gets accessed first during setup.

  1. Open Device Manager from…
    • Control Panel – System – Hardware – Device Manager (In Windows XP).
    • Control Panel – System and Maintenance – Administrative Tools – Computer Management – Device Manager (In Windows Vista).
    • Alternatively, in the Run box type devmgmt.msc.
  2. Unknown devices would be listed as such and marked out with a yellow question mark.
  3. Device-Manager

  4. Select the unknown device and right click to access Properties.
  5. In the Properties window click on Details tab and select Device Instance Id from the drop down.
  6. Device-ID

  7. An alphanumeric string like this PCI\VEN_1217&DEV_7130&SUBSYS_012F1025&REV_01\4&6B16D5B&0&33F0 is the identification marker for the device. We only need to isolate the Vendor ID number (prefixed with VEN) and the Device ID number (prefixed with DEV). In this case, Vendor ID is 1217 and Device ID is 7130.

With the numbers identified, a few resources can be tapped to get the vendors behind these numbers.

PCI Database

It is a reputedly the largest centralized database of PCI device IDs to find your device driver. Using the search box, you can search vendors and devices by IDs. Either one of the searches gives you the clue about the origins of this device. Further information can be obtained from the vendor's website or a Google search.

PCI-database-Search-results

The Software Way Using Unknown Devices

A small free standalone software aptly named Unknown Devices offers a quick way to get to the anonymous device drivers. The 630 KB sized software (beta ver.1.4.20) runs directly without an installation. The database used by the software comes in 3 text files located in the same folder.

  1. The program scans the devices installed and displays the name of the manufacturer and the devices discovered.
  2. Unknown-devcie

  3. The detailed info includes the vendor and device IDs along with the manufacturer names.
  4. Unknown-devcie_Details

  5. A Google search is available for any of the details with a right-click. For instance, a Google search using the hardware ID can be used to find device drivers.
  6. The text based database can also be queried for any hardware ID using its integrated Lookup Hardware ID search box.
  7. Unknown-devcie_Search

The beta version (1.4.20) extends support to Vista.

The info obtained using the above two methods, does not guarantee a solution. In some cases, the information will take us into a blind alley because the device driver itself is not available. But the two ways do help to unmask the unidentified devices and make them accessible with a few more details. With the devices identified, we are in a better position to query the manufacture or hunt around on the web for the right device driver.

Let me point you to some resources to find device drivers as a starter…

DriverGuide.com

With 400,000 drivers, it is very nearly king of the heap. The free membership comes with a few limitations like access to all 100,000+ member uploaded drivers but limited access to the site's own 300,000+ uploaded drivers. But free entry into its huge company database list and community forum makes this site a great hub. As it allows user submitted drivers, you can put in a request for an obsolete driver.

NoDevice.com

Nearly 30,000 drivers are indexed by company name and driver type. Read more about it here.

DriversPlanet.com

It offers a downloadable driver scanner. The site is well laid out with a database of 120,000 drivers listed by manufacturer and device type.

Let us know how you deal with an unknown device driver and make it a bit more recognizable.

Image credit: viagallery

Did you like the post? Please do share your thoughts in the comments section!

New on MakeUseOf ? Get cheat sheets and cool PDF guides @ www.makeuseof.com/makeuseof-downloads/

Related posts

segunda-feira, agosto 24, 2009

Entendendo o PCI DSS: Porque os padrões promovidos pelo Payment Card Industry Council são bem mais do que um simples Snake Oil


Este artigo do Eduardo Neves explica muito sobre o PCI-DSS. Imperdível para quem está envolvido no assunto.

Tech Support Cheat Sheet


via xkcd.com on 8/23/09
'Hey Megan, it's your father. How do I print out a flowchart?'

Video: Inside Kingston’s USB Stick Factory


via Wired: Gadget Lab by Charlie Sorrel on 8/24/09

Our good friend Sascha from Netbook News recently got to poke his nose around Kingston's production lines, specifically the factory where USB thumb drives are put together. Luckily for us, after Sascha had donned his natty cap and other dust-busting gear, he picked up his video camera and took it in with him.

The biggest surprise is how office-like this seems. If you expect the factory resemble those which churn out cars or wash returned milk bottles, you'll be disappointed. The machines which do the work here are small and quiet, more like photocopiers than giant, Transformer-like welding-bots. In fact, we're reminded of nothing so much as a high-street print bureau. Which is, given the nature of circuit production, not far from the truth. Bonus: Just over halfway in, the memory card in the video camera gets almost full — inside a memory-making factory!

How's a USB Is Made? Trip to the Kingston Production Plant [Netbook News. Thanks, Sascha!]

sexta-feira, agosto 21, 2009

Stupid Table Manners

Muito divertido, vale a leitura....


via Neatorama by Alex on 8/20/09

If you think about it, table manners are just one of the ways The Man has got us under his thumb. Separate forks for salad, fish, oyster and dinner? It's oppression, I tell you.

Our BFF BuzzFeed is revolting against some of the stupidest table manners today and have provided means for us regular Joes to resist being civilized:

1. Multiple Forks
Oppressive rule: You sit down at a fancy restaurant and are immediately faced with a vast array of forks.

Resistance solution: Side-step the utensils. God gave you hands for a reason.

2. Eating Soup With A Spoon
Oppressive rule: Despite the fact that soup is a liquid, we're forced to ladle in out in painfully small increments, always with the threat of spillage.

Resistance solution: Use a straw if it's thin broth; lift the bowl and DRINK DIRECTLY FROM THE BOWL if it's anything hearty.

Miss Manners is surely horrified: Link - Thanks Matt!

quinta-feira, agosto 20, 2009

Hardware Hackers Create a Modular Motherboard

1

via Wired: Gadget Lab by Priya Ganapati on 8/19/09

ixmachina

An ambitious group of hardware hackers have taken the fundamental building blocks of computing and turned them inside out in an attempt to make PCs significantly more efficient.

The group has created a motherboard prototype that uses separate modules, each of which has its own processor, memory and storage. Each square cell in this design serves as a mini-motherboard and network node; the cells can allocate power and decide to accept or reject incoming transmissions and programs independently. Together, they form a networked cluster with significantly greater power than the individual modules.

The design, called the Illuminato X Machina, is vastly different from the separate processor,memory and storage components that govern computers today.

"We are taking everything that goes into motherboard now and chopping it up," says David Ackley, associate professor of computer science at the University of New Mexico and one of the contributors to the project. "We have a CPU, RAM, data storage and serial ports for connectivity on every two square inches."

A modular architecture designed for parallel and distributed processing could help take computing to the next level, say its designers. Instead of having an entire system crash if a component experiences a fatal error, failure of a single cell can still leave the rest of the system operational. It also has the potential to change computing by ushering in machines that draw very little power.

"We are at a point where each computer processor maxes out at 3Ghz (clock speed) so you have to add more cores, but you are still sharing the resource within the system," says Justin Huynh, one of the key members of the project. "Adding cores the way we are doing now will last about a decade."

Huynh and his team are no strangers to experimenting with new ideas. Earlier this year, Huynh and his partner Matt Stack created the Open Source Hardware Bank, a peer-to-peer borrowing and lending club that funds open source hardware projects. Stack first started working on the X Machina idea about 10 months ago.

Computing today is based on the von Neumann architecture: a central processor, and separate memory and data storage. But that design poses a significant problem known as the von Neumann bottleneck. Though processors can get faster, the connection between the memory and the processor can get overloaded.That limits the speed of the computer to the pace at which it can transfer data between the two.

"A von Neumann machine is like the centrally planned economy, whereas the modular, bottom up, interconnected approach would be more capitalist," says Ackley."There are advantages to a centrally planned structure but eventually it will run into great inefficiencies."

ixm2By creating modules, Huynh and his group hope to bring a more parallel and distributed architecture. Cluster-based systems aren't new. They have been used in high end computing extensively. But with the Illuminato X Machina they hope to extend the idea to a larger community of general PC users.

"The way to think of this is that it is a system with a series of bacteria working together instead of a complex single cell amoeba," says JP Norair, architect of Dash 7, a new wireless and data standard. An electrical and computer engineering graduate from Princeton University, Norair has studied modular architecture extensively.

Each X Machina module has a 72 MHz processor (currently an ARM chip), a solid state drive of 16KB and 128KB of storage in an EEPROM (electrically erasable programmable read-0nly memory) chip. There's also an LED for display output and a button for user interaction.

Every module has four edges, and each edge can connect to its neighbors. It doesn't have sockets, standardized interconnects or a proprietary bus. Instead, the system uses a reversible connector. It's smart enough to know if it is plugged into a neighbor and can establish the correct power and signal wires to exchange power and information, says Mike Gionfriddo, one of the designers on the project.

The X Machina has software-controlled switches to gate the power moving through the system on the fly and a 'jumping gene' ability, which means executable code can flow directly from one module to another without always involving a PC-based program downloader.

Each Illuminato X Machina node also has a custom boot loader software that allows it to be programmed and reprogrammed by its neighbors, even as the overall system continues to run, explains Huynh. The X Machina creators hope to tie into the ardent Arduino community. Many simple Arduino sketches will run on the X Machina with no source code changes, they say.

Still there are many details that need to be worked out. Huynh and his group haven't yet benchmarked the system against traditional PCs to establish exactly how the two compare in terms of power consumption and speeds. The lack of benchmarking also means that they have no data yet on how the computing power of an X Machina array compares to a PC with an Intel Core 2 Duo chip.

Programs and applications have also yet to be written for the X Machina to show whether it can be an effective computing system for the kind of tasks most users perform. To answer some of these questions, Ackley plans to introduce the Illuminato X Machina to his class at the University of New Mexico later this month. Ackley hopes students of computer science will help understand how traditional computer programming concepts can be adapted to this new structure.

So far, just the first few steps towards this idea have been taken, says Huynh.

Norair agrees. "If they can successfully get half the power of an Intel chip with a cluster of microcontrollers, it will be a great success," he says, "because the power consumption can be so low on these clusters and they have a level of robustness we haven't seen yet."

See the video to hear David Ackley talk about programming the Illuminato X Machina.

Programming the Illuminato X Machina from Chris Ladden on Vimeo.

Photo: Illuminato X Machina/Justin Huynh

sexta-feira, agosto 14, 2009

8 Regular Expressions You Should Know

via Nettuts+ by Vasili on 8/10/09

Regular expressions are a language of their own. When you learn a new programming language, they're this little sub-language that makes no sense at first glance. Many times you have to read another tutorial, article, or book just to understand the "simple" pattern described. Today, we'll review eight regular expressions that you should know for your next coding project.

Background Info on Regular Expressions

This is what Wikipedia has to say about them:

In computing, regular expressions provide a concise and flexible means for identifying strings of text of interest, such as particular characters, words, or patterns of characters. Regular expressions (abbreviated as regex or regexp, with plural forms regexes, regexps, or regexen) are written in a formal language that can be interpreted by a regular expression processor, a program that either serves as a parser generator or examines text and identifies parts that match the provided specification.

Now, that doesn't really tell me much about the actual patterns. The regexes I'll be going over today contains characters such as \w, \s, \1, and many others that represent something totally different from what they look like.

If you'd like to learn a little about regular expressions before you continue reading this article, I'd suggest watching the Regular Expressions for Dummies screencast series.

The eight regular expressions we'll be going over today will allow you to match a(n): username, password, email, hex value (like #fff or #000), slug, URL, IP address, and an HTML tag. As the list goes down, the regular expressions get more and more confusing. The pictures for each regex in the beginning are easy to follow, but the last four are more easily understood by reading the explanation.

The key thing to remember about regular expressions is that they are almost read forwards and backwards at the same time. This sentence will make more sense when we talk about matching HTML tags.

Note: The delimiters used in the regular expressions are forward slashes, "/". Each pattern begins and ends with a delimiter. If a forward slash appears in a regex, we must escape it with a backslash: "\/".

Matching a Username

Matching a username

Pattern:

/^[a-z0-9_-]{3,16}$/

Description:

We begin by telling the parser to find the beginning of the string (^), followed by any lowercase letter (a-z), number (0-9), an underscore, or a hyphen. Next, {3,16} makes sure that are at least 3 of those characters, but no more than 16. Finally, we want the end of the string ($).

String that matches:

my-us3r_n4m3

String that doesn't match:

th1s1s-wayt00_l0ngt0beausername (too long)

Matching a Password

Matching a password

Pattern:

/^[a-z0-9_-]{6,18}$/

Description:

Matching a password is very similar to matching a username. The only difference is that instead of 3 to 16 letters, numbers, underscores, or hyphens, we want 6 to 18 of them ({6,18}).

String that matches:

myp4ssw0rd

String that doesn't match:

mypa$$w0rd (contains a dollar sign)

Matching a Hex Value

Matching a hex valud

Pattern:

/^#?([a-f0-9]{6}|[a-f0-9]{3})$/

Description:

We begin by telling the parser to find the beginning of the string (^). Next, a number sign is optional because it is followed a question mark. The question mark tells the parser that the preceding character — in this case a number sign — is optional, but to be "greedy" and capture it if it's there. Next, inside the first group (first group of parentheses), we can have two different situations. The first is any lowercase letter between a and f or a number six times. The vertical bar tells us that we can also have three lowercase letters between a and f or numbers instead. Finally, we want the end of the string ($).

The reason that I put the six character before is that parser will capture a hex value like #ffffff. If I had reversed it so that the three characters came first, the parser would only pick up #fff and not the other three f's.

String that matches:

#a3c113

String that doesn't match:

#4d82h4 (contains the letter h)

Matching a Slug

Matching a slug

Pattern:

/^[a-z0-9-]+$/

Description:

You will be using this regex if you ever have to work with mod_rewrite and pretty URL's. We begin by telling the parser to find the beginning of the string (^), followed by one or more (the plus sign) letters, numbers, or hyphens. Finally, we want the end of the string ($).

String that matches:

my-title-here

String that doesn't match:

my_title_here (contains underscores)

Matching an Email

Matching an email

Pattern:

/^([a-z0-9_\.-]+)@([\da-z\.-]+)\.([a-z\.]{2,6})$/

Description:

We begin by telling the parser to find the beginning of the string (^). Inside the first group, we match one or more lowercase letters, numbers, underscores, dots, or hyphens. I have escaped the dot because a non-escaped dot means any character. Directly after that, there must be an at sign. Next is the domain name which must be: one or more lowercase letters, numbers, underscores, dots, or hyphens. Then another (escaped) dot, with the extension being two to six letters or dots. I have 2 to 6 because of the country specific TLD's (.ny.us or .co.uk). Finally, we want the end of the string ($).

String that matches:

john@doe.com

String that doesn't match:

john@doe.something (TLD is too long)

Matching a URL

Matching a url

Pattern:

/^(https?:\/\/)?([\da-z\.-]+)\.([a-z\.]{2,6})([\/\w \.-]*)*\/?$/

Description:

This regex is almost like taking the ending part of the above regex, slapping it between "http://" and some file structure at the end. It sounds a lot simpler than it really is. To start off, we search for the beginning of the line with the caret.

The first capturing group is all option. It allows the URL to begin with "http://", "https://", or neither of them. I have a question mark after the s to allow URL's that have http or https. In order to make this entire group optional, I just added a question mark to the end of it.

Next is the domain name: one or more numbers, letters, dots, or hypens followed by another dot then two to six letters or dots. The following section is the optional files and directories. Inside the group, we want to match any number of forward slashes, letters, numbers, underscores, spaces, dots, or hyphens. Then we say that this group can be matched as many times as we want. Pretty much this allows multiple directories to be matched along with a file at the end. I have used the star instead of the question mark because the star says zero or more, not zero or one. If a question mark was to be used there, only one file/directory would be able to be matched.

Then a trailing slash is matched, but it can be optional. Finally we end with the end of the line.

String that matches:

http://net.tutsplus.com/about

String that doesn't match:

http://google.com/some/file!.html (contains an exclamation point)

Matching an IP Address

Matching an IP address

Pattern:

/^(?:(?:25[0-5]|2[0-4][0-9]|[01]?[0-9][0-9]?)\.){3}(?:25[0-5]|2[0-4][0-9]|[01]?[0-9][0-9]?)$/

Description:

Now, I'm not going to lie, I didn't write this regex; I got it from here. Now, that doesn't mean that I can't rip it apart character for character.

The first capture group really isn't a captured group because

?:

was placed inside which tells the parser to not capture this group (more on this in the last regex). We also want this non-captured group to be repeated three times — the {3} at the end of the group. This group contains another group, a subgroup, and a literal dot. The parser looks for a match in the subgroup then a dot to move on.

The subgroup is also another non-capture group. It's just a bunch of character sets (things inside brackets): the string "25″ followed by a number between 0 and 5; or the string "2″ and a number between 0 and 4 and any number; or an optional zero or one followed by two numbers, with the second being optional.

After we match three of those, it's onto the next non-capturing group. This one wants: the string "25″ followed by a number between 0 and 5; or the string "2″ with a number between 0 and 4 and another number at the end; or an optional zero or one followed by two numbers, with the second being optional.

We end this confusing regex with the end of the string.

String that matches:

73.60.124.136 (no, that is not my IP address :P )

String that doesn't match:

256.60.124.136 (the first group must be "25″ and a number between zero and five)

Matching an HTML Tag

Matching an HTML tag

Pattern:

/^<([a-z]+)([^<]+)*(?:>(.*)<\/\1>|\s+\/>)$/

Description:

One of the more useful regexes on the list. It matches any HTML tag with the content inside. As usually, we begin with the start of the line.

First comes the tag's name. It must be one or more letters long. This is the first capture group, it comes in handy when we have to grab the closing tag. The next thing are the tag's attributes. This is any character but a greater than sign (>). Since this is optional, but I want to match more than one character, the star is used. The plus sign makes up the attribute and value, and the star says as many attributes as you want.

Next comes the third non-capture group. Inside, it will contain either a greater than sign, some content, and a closing tag; or some spaces, a forward slash, and a greater than sign. The first option looks for a greater than sign followed by any number of characters, and the closing tag. \1 is used which represents the content that was captured in the first capturing group. In this case it was the tag's name. Now, if that couldn't be matched we want to look for a self closing tag (like an img, br, or hr tag). This needs to have one or more spaces followed by "/>".

The regex is ended with the end of the line.

String that matches:

<a href="http://net.tutsplus.com/">Nettuts+</a>

String that doesn't match:

<img src="img.jpg" alt="My image>" /> (attributes can't contain greater than signs)

Conclusion

I hope that you have grasped the ideas behind regular expressions a little bit better. Hopefully you'll be using these regexes in future projects! Many times you won't need to decipher a regex character by character, but sometimes if you do this it helps you learn. Just remember, don't be afraid of regular expressions, they might not seem it, but they make your life a lot easier. Just try and pull out a tag's name from a string without regular expressions! ;)

Five Classic Ways to Boost Your Note-Taking [Back To School]


via Lifehacker by Adam Pash on 8/12/09

If your note-taking skills are suffering from summertime rigor mortis, now's as good a time as any to throw a new technique into the mix. Let's take a look at some new and old tools for improving your ballpoint repertoire.

Photo by JasonRogersFooDogGiraffeBee.

The Cornell method

This oldie is a highly-regarded, very common system that makes it especially easier to retain information. By reviewing things as you go, you might even get away with less studying.

Divide your page into two columns. The left one (which could also just be the back of the previous page in your notebook) is narrower. You're going to jot larger ideas in this column: the 5-dollar-words and big bullet points. In the right column, you're going to take down as much information as possible. The right column is allowed to be messy, have pictures and tables—it's not necessarily organized. To some students, it's just regular notes. But as you go, record the main corresponding idea in the left column.

Every so often, cover the detailed notes on the right and just examine the main points and new vocab. See how much you can recite and explain in your own words. Then remove your hand and see how you did. Depending on the teacher, you might do this during lulls in the discussion or after class.

Some versions of the Cornell system leave the last few lines on each page for summarizing the whole page. Since what's on a given page doesn't necessarily group together nicely, I don't recommend doing it. But summarizing can help you with wading through piles of pages when studying time comes.

For a more in-depth look at the Cornell method, take a look at our previous guide to taking study-worthy lecture notes.

Go visual

It's tough to enter a classroom with colored pencils and still expect your fellow students to take you seriously. But unless you try it, you'll never know if it works better for you. Forget the status-quo and try something visual. Color-code with different pens, pencils, and highlighters. You might not have seen a web-style map of ideas since elementary school, but mind-mapping is hailed as quite an efficient way to group data. It needn't even be a rigid classification system—anything is better than doodling in the margins.

Switch mediums

For how tech-savvy our generation is, I still see surprisingly few laptops in classrooms. Try it out a few times and see if you like it. Particularly, if you're the type who outlines, computers let you go back and organize information on-the-fly. Laptops also let you and your classmates AIM with real-time questions about the opposite sex the lecture. There are also programs made just for taking notes, sharing them, organizing them, etc. Wikipedia has a great table that compares them all, or you can take a look at Lifehacker reader's favorite note-taking tools.

On the other hand, if you already use a laptop, try the pen-and-paper route again. Let loose a bit and see how that goes. Try scribbling out mistakes and drawing arrows everywhere. Or try one of the visual techniques above, most of which are difficult on a computer.

Shorthand

Notes are probably the only place in the classroom where internet slang is commendable. Trying some new shorthand is a really geeky way to slightly tweak your engravings and get you amped about taking notes again. Here are a few resources to get you started:

A Guide to Alternative Handwriting and Shorthand Systems
Shorthand Shorthand Shorthand

My favorite method is called Teeline—anyone can look at this one and learn a few things. It's mostly based around removing unimportant letters and making complex letters easier to write quickly.

Instead of converting entirely to shorthand, you might try translating just some of your most-frequently used words into a shorthand "language" that takes less time to write.

If you're taking notes on the computer, supercharge your repetitive typing with tools like our very own text-replacement application Texter (Windows) or TextExpander (Mac).

Don't

Oh goodness! Don't take notes? How controversial!

Well, it couldn't hurt to relax every once in a while. Especially in small classes and seminar situations, staying engaged through discussion and questions might do you better than scribbling every word.

Here's another way to avoid taking notes: Record your lectures. Digital recorders can capture hours of audio. Sit back and just listen. After class, you can play it back at double-speed and take notes in half the time. Take that, engineers!

The school-bound productivity nuts at weblog HackCollege will be joining us all week to offer their perspective on making the most of your Back to School regimen.

terça-feira, agosto 11, 2009

How to Photograph Abandoned Places


via Digital Photography School by Guest Contributor on 8/10/09

Abandoned buildings have become one of my favorite subjects to photograph. Over time, I have collected a handful of useful tips to get the most out of shooting in these environments.

Bring a Flashlight

The single most important tip I can provide anyone planning on visiting an abandoned building is to bring a flashlight. Most of these locations are without electricity and will have limited natural light. As such, you'll need a flashlight to help navigate the dark rooms and corridors that you will encounter.

Beyond its more obvious application, a flashlight can also provide an interesting source of off-camera lighting. I have a small LED flashlight that I carry on my camera bag and it is often used to light up an area of a room during a long exposure shot. While a strobe can certainly be effective for many of these situations, a flashlight allows for a high degree of precision with the light. You can directly control exactly what is lit and for how long. A flashlight can also add an element of movement to the lighting that will result in an unusual combination of shadows that a flash otherwise may not.

It takes some practice to get a feel for how much light is enough, but with some work the results can be very satisfying.

Stairwell by Chris Folsom

Stairwell by Chris Folsom

Tripod not Optional

Because of the aforementioned lighting conditions, it goes without saying that you will need a tripod. More than half of the photos I take at these locales are shot on a tripod with a long exposure of anywhere from a couple of seconds to as much as 20 or 30 seconds.

For those instances when I don't have my camera on a tripod, image stabilization and fast lenses help as well. My favorite lens is a 17-50mm f/2.8 paired with my camera's in-body stabilized sensor. Wide open, I can usually get a relatively sharp image at 1/10th of a second. More often than not though, the best results will come from shooting on a tripod.

Control the Exposure

I am not one who believes all serious photographers should shoot in manual 100% of the time. There are plenty of instances where I am confident that the camera will properly meter the lighting and autopilot mode is fine. Unfortunately, that tactic will not work in most abandoned buildings.

Because of the extreme lighting conditions of these spaces, you'll need to control all aspects of the shot. In the photo shown here, for example, I needed to control the aperture (I wanted this fairly sharp from front to back) and I needed to control the shutter speed to ensure proper lighting. So, in this case I shot for 30 seconds at f/8. This particular image is also another example of the flashlight technique described above… I used it to highlight and bring attention to the chairs while leaving the walls to be lit by the little bit of light coming from the window.

Auditorium by Chris Folsom

Auditorium by Chris Folsom

Go Wide

A wide angle lens can really add to the sense of emptiness and foreboding in these buildings. The photo shown below was taken by a friend of mine with a 10-22mm lens at 10mm. Having something that can go wide in the small areas you'll be photographing can be a huge benefit.

The Lobby by Jonathan Mowry

The Lobby by Jonathan Mowry

Emphasize the Mood

Use creative angles and perspectives to play up the natural character of the buildings. Get your camera low to the ground and shoot upwards to emphasize the vastness of a room, or shoot an angle to heighten the sense of disorientation. As a photographer you are telling the story of the place you are in and even a subtle shift of the camera's perspective can make a huge impact on the mood of the photo.

Mouth of Madness by Chris Folsom

Mouth of Madness by Chris Folsom

Focus on the Details

While it is easy to get caught up in the architecture, try to also pay attention to the discarded items and details in the area as well. Chairs, books, phones and other remnants from days gone by can provide a powerful centerpiece to the image. Focusing on a single object can also act as an anchor in an otherwise chaotic environment.

Lost Art by Chris Folsom

Lost Art by Chris Folsom

My final tip is for you to be careful while exploring these buildings. No photograph is worth endangering yourself, so take extreme precaution whenever you enter an unfamiliar location. Be safe and happy shooting!

chrisfolsomChris Folsom is a hobbyist photographer who spends much of his time photographing buildings that are no longer in use. You can view his site at studiotempura.com or see more of his photos at Flickr. His photos have been published on numerous websites and newspapers.

Post from: Digital Photography School - Photography Tips.

How to Photograph Abandoned Places

segunda-feira, agosto 10, 2009

eXtreme Power Suppply Calculator Helps Accurately Select a PSU [Hardware]


via Lifehacker by Jason Fitzpatrick on 8/10/09


If you checked out the PSU calculator we shared with you and wished it had a more detailed selection process for really granular and precise control, you'll definitely want to check out the eXtreme Power Supply Calculator.

The calculator in the link above is great for a quick estimate, but what if you want to be able to run a more detailed calculation before purchasing your new PSU? The eXtreme PSU calculator pulls from a very detailed database of parts to give you a more accurate estimate. During our testing we were able to select the exact CPU and graphics card, for example, that our test system was running.

There are dozens of variables you can set within the Lite version of the calculator, for even more options there is a $1.99 premium version of the calculator with even more settings for your calculating pleasure. Thanks Erik!

Moleque resolvendo dois cubos mágicos ENQUANTO toca Guitar Hero no Expert


via Gizmodo Brasil by Pedro Burgos on 8/9/09

O que o Youtube criou, meu Deus?

Sério. Qual o motivo de um cara treinar resolver um cubo mágico (ou dois!) enquanto toca Guitar Hero World Tour no Expert? "Melhorar a coordenação e a musculatura do cotovelo", você pode apontar. "É um exercício que os psicólogos passam hoje para curar crianças com déficit de atenção", uma prima da sua amiga que estuda psicologia dá o pitaco.

Mas não. A ideia é só colocar a façanha no Youtube e ver quantos % falam "você precisa fazer sexo" (mesmo que ele tenha aparentemente 16 anos), quantos escrevem "AWESOME" e quantos duvidam de alguma das coisas. "Foi tudo photoshopado".

Ah, sim, como você pode ver pela terrível execução de Mr. Crowley, do Ozzy, a especialidade do JRefleX93 é resolver Cubos Mágicos. O recorde dele no tradicional 3x3 é 16.44 segundos. Um pouco menos que o tempo que eu levo para comer um hamburguer do McDonald's. Como fazer isso sem estudar meticulosamente o cubo (perceba que ele olha pouco para o negócio): é "só" usar o Método Fridrich. Moleza. [Via Continue]

Chinese Farmer Builds His Own Flying Machine


via Wired: Gadget Lab by Charlie Sorrel on 8/10/09

chinese-farmer-wooden-helicopter-thumb-550x355-21956

"I had this dream from childhood of not needing to climb mountains anymore. I wanted to go to school in my own flying machine."

This was the childhood dream of Wu Zhongyuan, of China's Henan province. It is also, quite likely, a childhood dream of most you, dear Gadget Lab readers. Unlike you, though, Zhongyuan actually did something about it. He built his own helicopter.

The device, which likely breaks almost every airspace and safety law simultaneously, is made from steel scaffold, has blades cut from Elm and is powered by an old motorcycle engine. Zhongyuan says that the 'copter, which took three months and around $1600 to build, can soar to 800 meters (2600 feet). We're not sure if it can even get airborne, though, as currently the machine is grounded by Chinese authorities.

How did he come up with his ramshackle design? The internet, of course. "I didn't have a design. The only source for me to get relevant knowledge was surfing the internet via my mobile phone," he said to news site Ananova. We love it. A personal helicopter is a fantastic project, and we wish Zhongyuan luck getting it off the ground. Of course, we'd never go near the thing. Imagine being half a mile up and when the engine cuts out on you. No thanks.

Farmer's home-made helicopter [Ananova via DVICE]

Chinese farmer builds a working wooden helicopter [Auto Motto]

Bloging

Tá dificil de blogar alguma coisa por aqui, heim ?

Depois do Twitter, Google Reader, etc, esse blog que ja era pouco atualizado piorou...

Bom, vou fazer uma ponte dos meus shares do Reader para cá.

Valeu !

terça-feira, julho 14, 2009

quarta-feira, julho 01, 2009

YSTS 3, um sucesso !


YSTS 3 acabou (alias, ja fazem 10 dias, mas só agora arrumei tempo pra postar). Foi muito bom e tivemos muitos feedbacks positivos. Alguns negativos, afinal, cometemos erros tambem. O mais notório sem dúvida é em relação ao barulho das pessoas conversando depois do início do Open Bar. Algo a ser resolvido na edição 4.
Por hora, vejam as fotos:
Set 1 - Set 2 - Set 3 - Set 4 - Set 5 - Set 6

quarta-feira, junho 17, 2009


Luis Miras e Zane Lackey irão apresentar no YSTS em primeira mão suas recentes pesquisas e ferramenta de ataque a telefones celulares usando SMS como vetor. Esta apresentação ocorre antes da anunciada para a Blackhat USA 2009